Customizing your WooCommerce email templates is a great way to enhance the overall branding of your online store.
Whether you want to add your logo, change the color scheme, or include specific customer information. There are various ways you can customize the emails sent out from your WooCommerce store.
How to customize WooCommerce emails without any plugins (The hard way)
Doing it without plugins may prove to be a challenging task for those unfamiliar with coding. But if you prefer to do it this way this is what you need to do:
1. Locate the Emails Template Files:
The first step is to find the template files that define the content of the emails in WooCommerce. These template files are located in the following directory: wp-content/plugins/woocommerce/templates/emails.
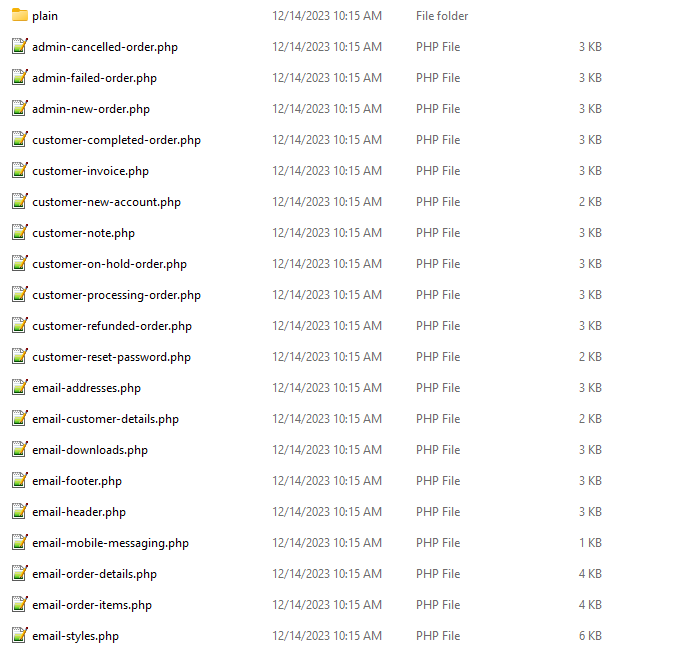
In this folder, you will find the ‘HTML’ templates but you will also find a subfolder with the name ‘plain’. This folder has the “only text” emails (emails that have no images or any formatting). For now, we are going to focus on the HTML templates.
2. Copy the template you want to customize into your theme folder:
You could edit the template directly but any change you make will be lost after you update WooCommerce. To prevent this from happening you need to copy the template into the folder wp-content/themes/yourtheme/woocommerce/emails
So for example, if you want to customize the “admin new order” email (the email that admins receive when a new order is placed). You need to copy the template wp-content/plugins/woocommerce/templates/emails/admin-new-order.php to wp-content/themes/yourtheme/woocommerce/emails/admin-new-order.php
3. Customize the Template File:
Start customizing it according to your needs. You can change the colors, fonts, layout, and content by editing the HTML and CSS code. Again, this would require experience with PHP, HTML, CSS.
If you insist on doing it yourself. Once you open a template you will see that it contains a bunch of ‘do_actions’ code and few HTML code. For example, this is the content that the ‘admin-new-order.php’ template has:
<?php
/**
 * Admin new order email
 *
 * This template can be overridden by copying it to yourtheme/woocommerce/emails/admin-new-order.php.
 *
 * HOWEVER, on occasion WooCommerce will need to update template files and you
 * (the theme developer) will need to copy the new files to your theme to
 * maintain compatibility. We try to do this as little as possible, but it does
 * happen. When this occurs the version of the template file will be bumped and
 * the readme will list any important changes.
 *
 * @see https://woo.com/document/template-structure/
 * @package WooCommerce\Templates\Emails\HTML
 * @version 3.7.0
 */

defined( 'ABSPATH' ) || exit;

/*
 * @hooked WC_Emails::email_header() Output the email header
 */
do_action( 'woocommerce_email_header', $email_heading, $email ); ?>

<?php /* translators: %s: Customer billing full name */ ?>
<p><?php printf( esc_html__( 'You’ve received the following order from %s:', 'woocommerce' ), $order->get_formatted_billing_full_name() ); // phpcs:ignore WordPress.Security.EscapeOutput.OutputNotEscaped ?></p>
<?php

/*
 * @hooked WC_Emails::order_details() Shows the order details table.
 * @hooked WC_Structured_Data::generate_order_data() Generates structured data.
 * @hooked WC_Structured_Data::output_structured_data() Outputs structured data.
 * @since 2.5.0
 */
do_action( 'woocommerce_email_order_details', $order, $sent_to_admin, $plain_text, $email );

/*
 * @hooked WC_Emails::order_meta() Shows order meta data.
 */
do_action( 'woocommerce_email_order_meta', $order, $sent_to_admin, $plain_text, $email );

/*
 * @hooked WC_Emails::customer_details() Shows customer details
 * @hooked WC_Emails::email_address() Shows email address
 */
do_action( 'woocommerce_email_customer_details', $order, $sent_to_admin, $plain_text, $email );

/**
 * Show user-defined additional content - this is set in each email's settings.
 */
if ( $additional_content ) {
	echo wp_kses_post( wpautop( wptexturize( $additional_content ) ) );
}

/*
 * @hooked WC_Emails::email_footer() Output the email footer
 */
do_action( 'woocommerce_email_footer', $email );
These ‘do_action’ lines are just calling other templates you will also need. For example this line:
line do_action( ‘woocommerce_email_header’, $email_heading, $email );
Is loading the template email-header.php. So if you want to edit the header you need to edit that template. Keep in mind though that editing the header would also affect all the other templates that are using it.
If you want to edit the header without affecting other templates. Just copy its content and remove the respective do_action code.
4. Save your changes and that’s it:
After saving WooCommerce will automatically use your customized template.
Disadvantages of editing the WooCommerce templates manually (without plugins)
Editing WooCommerce email templates manually may seem like a cost-effective and straightforward solution. However, there are several disadvantages to consider before diving into this task:
You need at least PHP, HTML, and CSS Knowledge: If you want to do something as simple as adding your company logo you need to understand the code that you are editing which will require PHP and HTML knowledge. If you want to edit the colors or general style of the template you will also need CSS knowledge and if you want to do something else like adding some other info that is coming from the order you will also need some understanding of the WooCommerce classes.
You can break your emails if you make a mistake: Having a small PHP error in your template could cause your site to crash when attempting to use the template.
Your templates might look bad if you are not familiar with creating HTML emails: Even if you are a web designer it is important to notice that creating email templates is not the same, many things won’t work fine in an HTML email as all the email providers put restrictions in the kind of tags and CSS styles they support. So before you start designing your email you should check the best practices
Its time consuming: Doing the code yourself could be very time-consuming, especially if you want to make big changes to the standard layout.
So if you are not a developer or are not willing to deal with these issues you can use the next alternative.
How to customize the emails using Advanced Emailing for WooCommerce
With advanced emailing for WooCommerce you can customize your emails using a drag-and-drop builder similar to elementor, no coding skills are required.
Installing Advanced Emailing for WooCommerce
To install the free version of the plugin follow these steps:
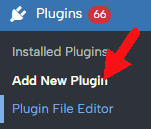
1.- Go to your site dashboard and click on Plugins / Add New Plugin
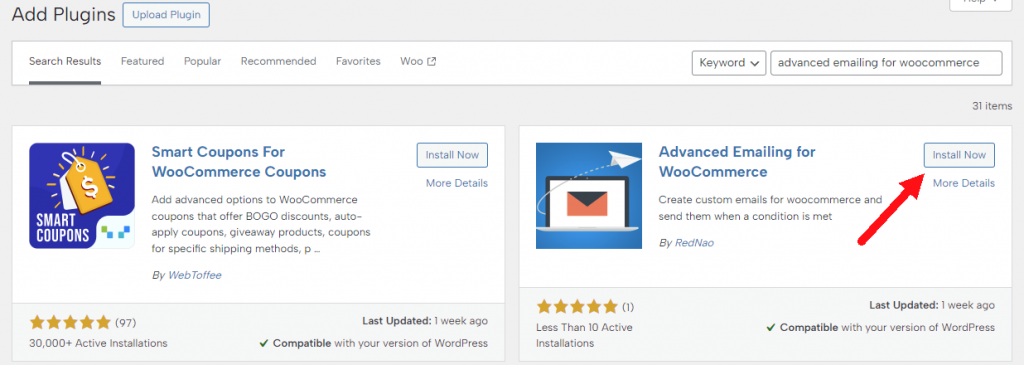
2.- Search for “advanced emailing for WooCommerce” and click on “Install Now”
3.- After installing click on activate and the plugin is ready to use
Creating a WooCommerce email template
Once you have the plugin active the next thing you need to do is create a new WooCommerce email template, you could use this to create a completely new email, for example, an email that is sent to your warehouse or one that is sent only when a specific product is purchased. But in this case, we are going to create one that is going to replace the standard WooCommerce “Order Completed” email.
To do so, follow these steps:
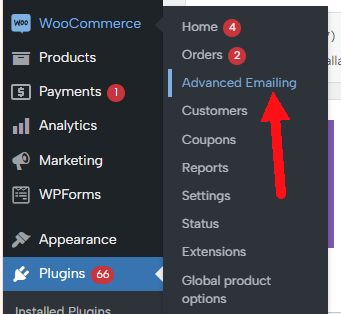
1.- Go to WooCommerce / Advanced Emailing
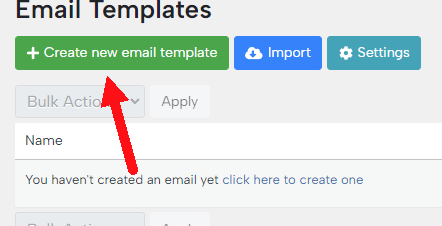
2.- Click on ‘Create new email template’
3.- Select a template, for this example I am going to use the standard template that WooCommerce uses. But if you have the full version you can pick from a list of online templates

4.- Use the drag-and-drop designer to change the template as you want it. With the designer, you just need to add or move the components of the email where you want them, for example, here is a small video about how to add the company logo and name to the email
This is just a basic demonstration but you can do so much more, like adding conditional content, QR codes, information from other plugins, etc. For more information about what you can do check the documentation or for some inspiration on what you can do check our templates
Using your template instead of the original WooCommerce email
Once you finish configuring your template the last step is to replace the standard WooCommerce Email with your own, to do so follow these steps:
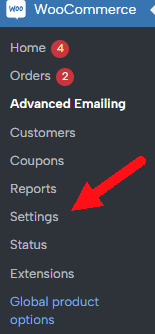
1.- Go to WooCommerce / Settings
2.- Go to the Emails Tab

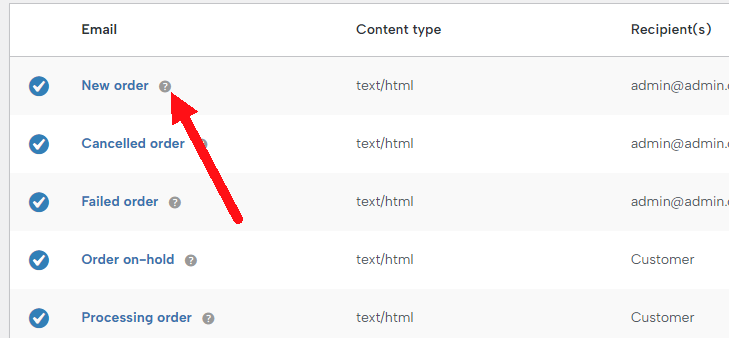
3.- Select the email that you want to replace, in this case, I want to replace the ‘New order’ email
4.- In the setting “Overwrite with advanced email’ select the template that you want to use, in this case, i am going to select the template that I just created
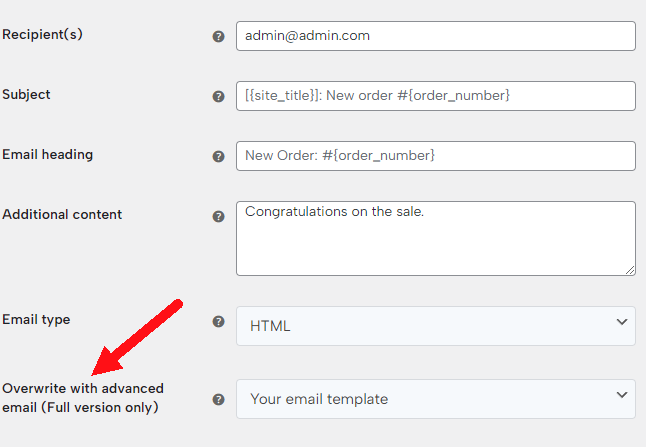
That’s it! Now just save and WooCommerce will use your template instead of the standard one.
Creating your own emails
As you can see, it is pretty easy to customize the WooCommerce emails using the plugin, but you can do much more with it. You can create emails that WooCommerce doesn’t have, for example, you could send an email with special instructions or discounts when a client purchases a specific product. Or you can send an email with all the information they need (like product weight, SKU, and quantity) to your warehouse.
To create a new WooCommerce email and send it when a condition is met (for example when an order is created or a specific product is purchased). Do the following:
1.- Crate a new WooCommerce template: You already did this in the previous section.
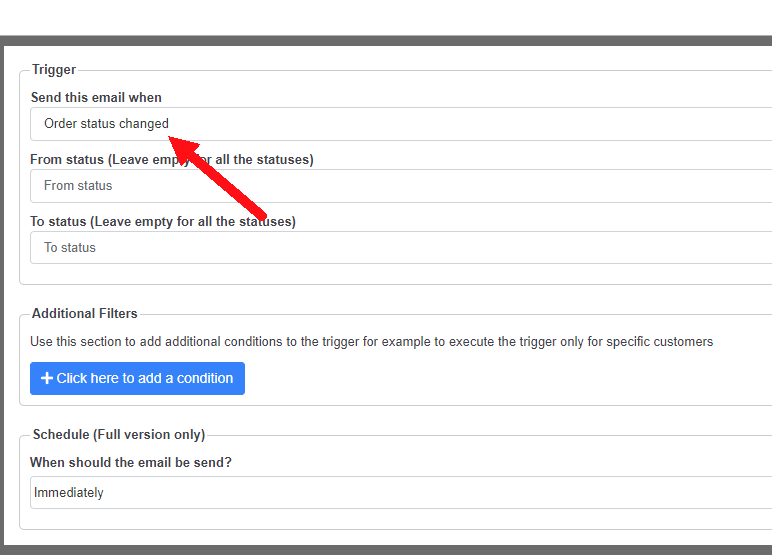
2.- Go to settings/automation condition: If you want to send your email automatically when a condition is met (like when an order is created or a specific product is purchased) follow the next steps, otherwise, you can save your template and you are done, you can send the email directly in the ‘Orders’ page.

3.- Define your trigger: Here you can select when you want to trigger the email, for example when an order is created or a cart is abandoned.
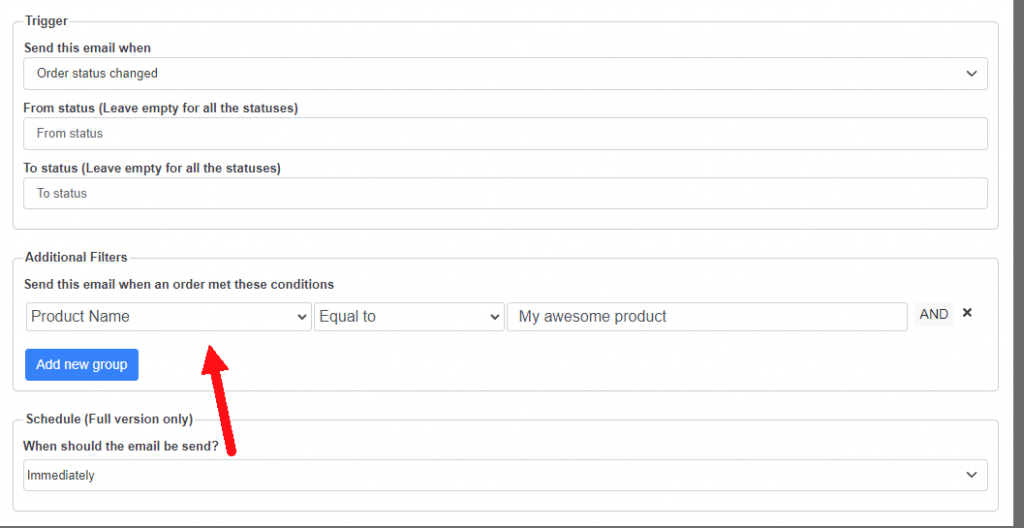
4.- Define a condition: Sometimes selecting a trigger might not be enough, for example, you might want to send the email only when a more specific condition happens, for example when a specific product is purchased, that you can use the additional filters to define your condition. In the example below i would only send the email when my product with the name “My awesome product” is purchased.
5.- Save and you are done! Now your email will be sent when your defined condition is met.
Conclusion
You learned how to change the WooCommerce email templates, you can change them either with or without plugins, if you are a programmer and you just want to do a basic change using the first alternative (without plugins) might be the best option for anything else probably is better to use a plugin.
For more information on what you can do with the plugin check the documentation or check the templates
Or if you prefer you can try the free version
Lastly, if you are to go ahead and get the full version here